
How to Prime a New Vape Coil Properly
Table of Contents
- What Is Coil Priming and Why It Matters
- Step-by-Step Guide to Priming Your Vape Coil
- How Long to Wait After Filling Your Vape Tank
- How to Break In a New Vape Coil Properly
- Priming Different Coil Types and E-Liquid Ratios
- Troubleshooting Burnt Taste in Your Vape
- Common Priming Mistakes to Avoid
- Frequently Asked Questions
Last Updated: September 23, 2026
What Is Coil Priming and Why It Matters
Coil priming is saturating the cotton wick inside your replacement coil with e-liquid before use. It prepares the coil to perform at its best.
Without priming, the dry cotton burns instead of vaporizing e-liquid, creating a burnt taste and permanent coil damage.
Learning how to prime a new vape coil properly takes minutes and prevents burnt hits. We recommend following this process every time you install a new coil.
A properly primed coil lasts longer and delivers better vapor production.
Step-by-Step Guide to Priming Your Vape Coil
Priming involves three steps: dripping e-liquid onto cotton ports, installing the coil, and filling the tank.
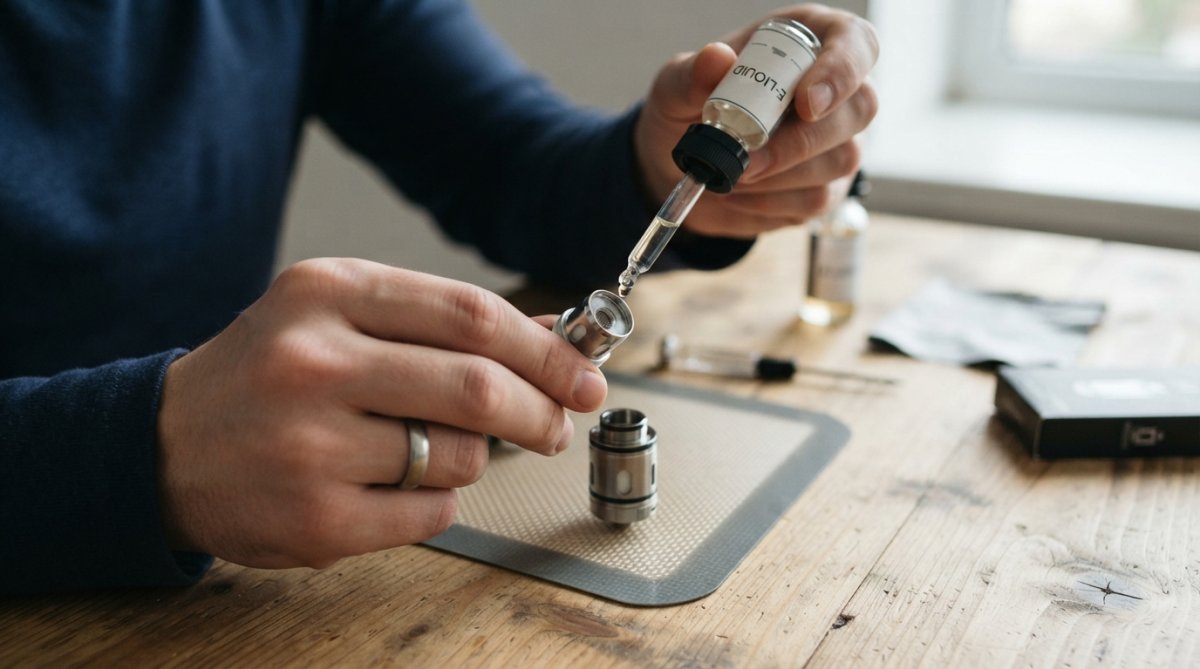
Dripping E-Liquid on Cotton Ports
Locate the small cotton ports around the coil's sides, the openings where e-liquid flows into the wick during use.
Apply 2-3 drops of liquid directly onto each cotton port to saturate the cotton without flooding.
Properly saturated cotton appears visibly wet with a slight sheen, but e-liquid should not drip or pool.
Over-saturated cotton looks glossy with pooling liquid, causing flooding, gurgling, and weak draws. Tap the coil over a paper towel to remove excess.
Under-saturated cotton appears dry, creating hot spots that burn on first use.
Mesh coils saturate faster because liquid flows freely through the mesh. Round-wire coils require extra time to ensure even saturation around the wire.
For high-VG e-liquid, apply 3-4 drops per port since viscous liquid absorbs more slowly.
Installing the Coil Into Your Tank
Screw the coil into your tank and hand-tighten only; forcing it can strip threading or crack the glass.
Ensure the coil sits flush; a loose coil leaks, and an over-tight coil cracks the glass.
Check that threading feels smooth. If you feel resistance or grinding, back it out and try again.
Filling Your Tank With E-Liquid
Fill your tank by removing the drip tip or opening the fill port, then pour liquid slowly.
Fill to the marked line. Overfilling causes flooding and gurgling.
How Long to Wait After Filling Your Vape Tank
Wait 5-10 minutes before vaping to let e-liquid fully saturate the cotton wick.
High-PG liquids need shorter soak times; high-VG liquids need 15-20 minutes.
How to Break In a New Vape Coil Properly
Breaking in differs from priming: it means using the coil correctly for the first few draws to allow the cotton to settle around the heating element.
Wattage Mode Break-In
Start at 10-15 watts below the coil's recommended minimum (e.g., 25-30 watts for a 40-60 watt coil).
Take 3-5 slow draws lasting 2-3 seconds each, letting the cotton expand and settle around the heating element.
Increase wattage by 5 watts every few draws over 10-15 puffs. This extends coil life and stabilizes flavor and vapor production.
If you jump straight to high wattage, say, starting at 55 watts on a 40-60 watt coil, the coil experiences thermal shock. The cotton can't absorb liquid fast enough to keep up with the heat. The result is a burnt hit that can permanently damage the coil's flavor profile. Even if the coil doesn't taste burnt immediately, the cotton fibers may be partially scorched, reducing the coil's lifespan from 2-3 weeks to just a few days.
Temperature Control Mode Break-In
Temperature control (TC) mode is available on advanced devices and uses coils made from nickel, titanium, or stainless steel. TC mode monitors the coil's resistance as it heats and adjusts power to maintain a target temperature, preventing the coil from exceeding that threshold.
Caliburn G Replacement Coils →
TC mode is actually safer for break-in because it prevents thermal shock automatically. However, the break-in principle remains the same: start low and increase gradually.
When breaking in a TC coil, set your target temperature to 180-190°C for the first 5-10 puffs. This is significantly lower than typical vaping temperatures (200-230°C), but it allows the cotton to saturate evenly without risk of burning.
After 5-10 puffs at low temperature, increase the target by 10°C and take another 5 puffs. Continue this pattern until you reach your preferred temperature, usually 210-220°C. TC mode's automatic power regulation means you won't experience the sudden heat spike that causes burnt hits in wattage mode.
If your device supports both wattage and TC modes, TC mode is the better choice for break-in because it provides more consistent, controlled heating. However, not all coils are compatible with TC mode; check your coil's specifications before attempting to use it in temperature control.
Why Gradual Heat Matters
When a coil heats rapidly, the cotton fibers expand suddenly, and the e-liquid inside them vaporizes before it can be replaced by fresh liquid from the tank. This creates a dry spot where the cotton touches the heating element. When the heating element reaches that dry spot, it burns the cotton fibers, creating the characteristic burnt taste.
Gradual heating allows the cotton to expand slowly and evenly. Fresh e-liquid flows in from the tank to replace the liquid being vaporized, maintaining saturation. The cotton fibers settle around the heating element in their expanded state, creating an optimal contact surface for heat transfer and flavor delivery.
Coil resistance also affects thermal behavior. Lower-resistance coils (below 0.5 ohms) heat faster and require more careful break-in. Higher-resistance coils (above 1.0 ohm) heat more slowly and are more forgiving. If you're using a sub-ohm coil for the first time, extend your break-in period to 15-20 puffs and increase wattage in smaller 3-watt increments instead of 5-watt jumps.
Signs Your Coil Is Ready
After 10-15 minutes of gradual use, your coil should produce smooth, flavorful vapor without any burnt taste. The flavor will be noticeably cleaner than the first few puffs. Vapor production will be consistent and dense. If you're still experiencing a slightly muted flavor or thin vapor after 15 minutes, continue the gradual increase for another 5-10 puffs; some coils take longer to fully settle.
Once the coil is broken in, you can use it at its full recommended wattage or temperature range without concern. A properly broken-in coil typically lasts 2-4 weeks with regular use, depending on e-liquid viscosity and your vaping frequency.
Priming Different Coil Types and E-Liquid Ratios
Not all coils prime the same way. Mesh coils, traditional round wire coils, and pod coils each have different saturation rates. Your e-liquid's VG/PG ratio also affects how quickly the cotton absorbs liquid.
Mesh Coils vs. Traditional Round Wire Coils
Mesh coils have a wider surface area because the heating element is a mesh strip instead of a thin wire. This larger surface means faster, more even heating and better flavor.
Mesh coils saturate quickly because of their design. The mesh allows liquid to flow freely through the coil structure. Priming a mesh coil takes the same steps, but you can use slightly less liquid on the cotton ports since the mesh absorbs faster.
Traditional round wire coils use a thin wire wrapped in cotton. The cotton is denser around the wire, so saturation takes slightly longer. These coils need a full soak time, don't rush the 5-10 minute wait.
Round wire coils tend to last longer if primed properly. The slower saturation actually works in your favor because it forces you to be patient. Mesh coils are faster but may not last as long.
Most modern devices use mesh coils. If you're buying replacement coils for a UWELL device like the Caliburn G Replacement Coils, you're working with a reliable mesh design that primes quickly and consistently.

Adjusting for High-VG and High-PG E-Liquids
High-VG liquids (70% VG or higher) are thick and viscous. They absorb into cotton slowly. When you prime a coil for high-VG juice, apply extra liquid to the cotton ports. Use 3-4 drops per port instead of 2-3.
Also extend your soak time to 15-20 minutes. The thick liquid needs extra time to fully saturate the cotton. Rushing this step with high-VG liquid almost guarantees a burnt hit.
High-PG liquids (70% PG or higher) are thin and watery. They absorb quickly into cotton. You can use fewer drops, 1-2 per port, because the liquid flows easily.
Soak time can be shorter, around 5 minutes.
Troubleshooting Burnt Taste in Your Vape
A burnt taste means your cotton wick is burning instead of vaporizing e-liquid. This happens when the cotton dries out or when wattage is too high.
Common Priming Mistakes to Avoid
Reusing old coils. A burnt coil doesn't recover. Priming a damaged coil won't fix it. Replace it with a new one.
Frequently Asked Questions
What happens if you don't prime your vape coil?
Skipping the priming process causes dry hits and a burnt taste almost immediately. When the cotton wick isn't saturated with e-liquid before heating, the coil burns the fibers instead of vaporizing liquid, destroying flavor and potentially damaging the coil permanently. This is one of the most common reasons new vapers experience a harsh, unpleasant vaping experience and mistakenly think their device is faulty.
How long should you let a new vape coil sit before using it?
After filling your tank, wait at least 5-10 minutes for the cotton wick to fully saturate. For high-VG e-liquids (which are thicker and absorb more slowly), extend this to 15-20 minutes. If you're using a sub-ohm coil with lower resistance, give it the full 20 minutes. This soaking period is critical; rushing this step is the fastest way to burn out a brand-new coil.
Can you prime a coil too much?
No, you cannot over-prime a coil by letting it soak longer. More saturation time only improves wicking and flavor. However, you can cause flooding by adding too much e-liquid directly to the cotton ports before installation, which leads to gurgling and leaking. Drip liquid onto the exposed cotton until it glistens but doesn't pool or drip.
How do I know if my vape coil is properly primed?
A properly primed coil produces smooth, flavorful vapor from the first draw without any burnt taste. Visually, the cotton wick should appear fully saturated (darker in color) and no longer dry or white. During your first few puffs at low wattage, you should taste the e-liquid clearly. If you detect any harshness or burnt flavor, stop immediately and give the tank more soaking time.