
How to Clean Your Vape Device for Better Performance
Last Updated: November 4, 2026
Quick Summary
To clean a vape device for better performance, turn it off, disconnect it from charging, let it cool, and clean only removable parts according to the manufacturer’s instructions. Keep the battery and electrical components dry, use a dry cotton swab on contacts, and let washable parts dry completely before reassembly.
- Use warm water only on removable parts the manufacturer identifies as washable.
- Do not rinse sealed pods, cartridges, battery connections, or other electrical components.
- Replace a coil, wick, pod, or cartridge if damage, persistent clogging, or burnt taste remains.
- Inspect O-rings and seals while the tank is apart; replace any that are split, stretched, or missing.
Table of Contents
- How to Clean Your Vape Device for Better Performance
- Best Tools for Cleaning Vape Devices
- Step 1: Turn Off and Disassemble Your Vape Device Safely
- Step 2: Clean the Mouthpiece, Tank, Pod, and Cartridge
- Step 3: Wipe Battery Contacts and Reassemble Only When Dry
- How Often to Clean Vape Tank Components
- How to Fix Burnt Vape Taste After Cleaning
- Get Help Choosing Cleaning Supplies for Your Vape
- Frequently Asked Questions
How to Clean Your Vape Device for Better Performance
Regular cleaning helps a vape device keep its airflow clear and its flavor consistent. This guide explains how to clean your vape device for better performance without risking damage.
A vape device is a battery-powered unit that heats e-liquid or another compatible material to create vapor. The best cleaning method depends on its design, so check the manufacturer’s instructions before taking it apart. Health Canada’s vaping product safety guidance offers information on using vaping products safely.
Best Tools for Cleaning Vape Devices
The best tools for cleaning vape devices are a soft brush, cotton swabs, and a clean paper towel. Use warm water for washable, non-electrical parts only. Avoid soaking any part unless the device maker says it is safe.
- Cotton swabs: Wipe small areas and connection points.
- Soft brushes: Loosen dry residue without scraping.
- Paper towels: Wipe parts and catch drips.
- Warm water: Rinse compatible, removable parts.
For small areas, Randy's Swipes are individually wrapped cleaning wands. Randy's Brushes are individual brushes listed in 5 mm and 8 mm sizes.


Step 1: Turn Off and Disassemble Your Vape Device Safely
Turn off the vape device, disconnect it from charging, and let it cool before cleaning. Then remove only the parts the manufacturer says are removable. A common mistake is pulling at a stuck pod or coil; forcing it can damage the part or its fit.
Keep the battery and other electrical components dry. If your device has a removable tank, set it apart from the battery before wiping or rinsing anything.
- Read the device maker’s cleaning directions.
- Remove the pod, tank, or mouthpiece gently.
- Keep coils aside unless the maker says to clean them.
- Stop if a part resists removal.
Health Canada’s guidance on vaping product use and safety is a useful reference, but your device’s own instructions should guide its care.
Step 2: Clean the Mouthpiece, Tank, Pod, and Cartridge
Cleaning depends on the device: a removable glass tank may tolerate a water rinse, while a sealed pod or cartridge may be damaged by one. Check the manufacturer’s instructions for the exact model before using water or alcohol, and clean only parts identified as removable and washable.
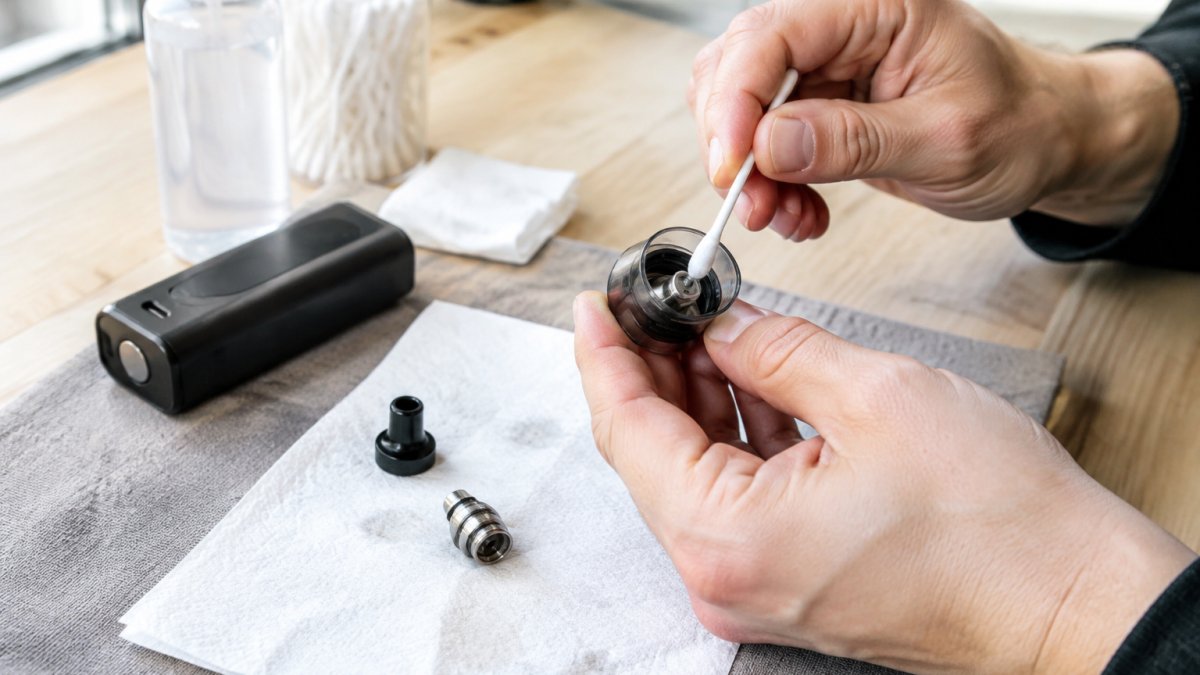
- Mouthpiece: Remove it if the design allows. Wipe away visible residue with a dry cotton swab or rinse it with warm water only if the maker says it is washable. Clear the opening gently; do not push a swab deep enough to leave fibers inside.
- Refillable tank: Empty the e-liquid, separate the tank from the battery, and remove the coil only if the instructions allow it. Rinse compatible glass and metal tank parts with warm water, then leave them to air-dry completely. A soft brush or cotton swab can loosen residue in accessible areas; do not scrape glass or seals.
- Pod system: Treat a sealed or disposable pod as a replaceable part unless its maker specifically provides cleaning instructions. Wipe the outside and accessible contacts with a dry swab. Do not rinse a pod that contains a coil, wick, or electrical components.
- Cartridge battery and cartridge: Keep the cartridge attached to its own cleaning instructions, not the battery’s. Wipe residue from the cartridge exterior and battery connection with a dry swab. Do not pour water or alcohol into the cartridge or battery connection.
- Dry-herb or concentrate chamber: Let the device cool, remove loose material with the supplied tool or a soft brush, and use a dry swab for accessible residue. Use isopropyl alcohol only on surfaces the manufacturer identifies as compatible, and keep it away from seals, plastics, electronics, and any heating element unless the instructions explicitly permit it.
Avoid scented household cleaners, dish soap, and abrasive tools: they can leave residue or damage finishes and seals. If the manufacturer permits alcohol on a removable part, use it sparingly in a ventilated area, keep it away from flames and heat, and allow the part to dry fully before use. Never use a part that still smells of cleaner or alcohol.
Watch out: Do not try to restore a burnt or persistently clogged coil by soaking or scrubbing it; residue can remain in the wick, and cleaning may not restore its performance.
Inspect O-rings and seals while the tank is apart. Replace a split, stretched, or missing seal rather than trying to clean it back into shape. Replace a coil, wick, pod, or cartridge when the maker’s instructions call for replacement or when damage, persistent clogging, or a burnt taste remains after the other washable parts are clean. For more detail, see our vape tank cleaning guide.
Step 3: Wipe Battery Contacts and Reassemble Only When Dry
Wipe battery contacts and threading with a dry cotton swab, not a wet cloth. The connection point must be free of visible residue and fully dry before you reassemble the vape device. Keep water and cleaning solution away from the battery.
The common advice to rinse every part is wrong. A dry wipe is the safer choice for battery connections and other electrical areas.
- Check the contacts for residue or damage.
- Make sure each part is fully dry.
- Reassemble gently; do not force the threading.
- Follow the maker’s instructions before charging.
How Often to Clean Vape Tank Components
How often to clean vape tank components depends on use, residue, and the device maker’s guidance. A quick wipe when you refill can help you spot buildup early. Clean more thoroughly when you notice a change in flavor, airflow, or vapor production.
There is no single schedule for every vape pen, pod, or tank. The useful test is condition, not a fixed calendar: inspect the mouthpiece, tank, and connection point during routine refills.
| Part or sign | What to do | Why it helps |
|---|---|---|
| Mouthpiece at refill | Wipe visible residue | Keeps the opening clear |
| Tank with buildup | Clean as maker directs | Helps restore airflow |
| Battery contact | Dry-wipe residue | Supports a clean connection |
| Worn coil or pod | Replace if directed | Cleaning may not fix wear |
How to Fix Burnt Vape Taste After Cleaning
A burnt taste after cleaning does not always mean the device needs another wash. First turn it off, disconnect it from charging, and let it cool. Check that every washed part is fully dry, that the tank or pod is assembled as directed, and that no cleaning residue remains. Then use the symptom checklist below to decide whether cleaning, drying, or replacing a part is the safer next step.
- Burnt taste: A coil or wick may be worn or may not be properly saturated. Follow the device maker’s filling and use instructions, and replace the coil or pod if the burnt taste persists. Do not keep using a damaged or burnt-smelling part.
- Weak vapor: Check that the airflow openings are clear, the tank or cartridge is seated correctly, and the battery connection is clean and dry. If the device still produces weak vapor, consult its manual; cleaning cannot correct a depleted battery or a failing component.
- Leaking: Check that the tank is assembled correctly and that its O-rings or seals are present and undamaged. Replace a damaged seal. Do not overtighten threaded parts, which can damage the fit.
- Persistent clogging: Clear only accessible openings gently with a dry swab or the tool supplied with the device. If a pod, cartridge, or coil remains clogged, follow the maker’s replacement guidance rather than forcing a tool into it or soaking it.
- No vapor after cleaning: Confirm that the device is dry, assembled correctly, and charged according to its instructions. If it still does not work, stop using it and contact the manufacturer or retailer for device-specific guidance.
Watch out: If liquid has entered the battery or another electrical area, do not charge or use the device; follow the manufacturer’s instructions for what to do next.
Cleaning can remove residue from washable parts, but it cannot repair a worn wick, damaged seal, faulty battery, or broken component. Replace parts only as directed for your model, and check the manual before trying a cleaning method that is not listed. Our guide explains how to clean vape coils when coil care is the issue.
Health Canada’s information on vaping products and health provides broader safety information.
Get Help Choosing Cleaning Supplies for Your Vape
The safest cleaning routine is the one that fits your device, not a one-size-fits-all method. At Bay Roberts Vape and Glass Shop, we offer Randy’s Swipes and Randy’s Brushes. If you are unsure which parts can be cleaned, check the device instructions before using water or a cleaning product.
Frequently Asked Questions
Can I use water to clean my vape tank?
Warm water can rinse removable, non-electrical tank parts when the device manufacturer allows it. Take the tank apart as directed, keep water away from the battery and other electrical components, and let every rinsed part air-dry completely before reassembly. Avoid soaking a coil unless its manufacturer specifically says it is suitable for cleaning; replacing a used coil is often the safer choice when residue or burnt flavor remains.
How do I remove e-liquid buildup from a vape?
Disassemble the device according to its instructions, then wipe residue from removable non-electrical parts with a clean paper towel or suitable cleaning wand. A cotton swab can reach threading and small connection points. Rinse only parts the manufacturer permits, and dry them fully before reassembling. Keep liquid away from the battery and electrical components. If buildup remains in a coil or a burnt taste persists, replace the coil rather than trying to scrub it.
How do I know if my vape coil needs to be replaced or just cleaned?
Clean removable parts when you see e-liquid residue or notice restricted airflow, but do not assume the coil itself can be restored by cleaning. A persistent burnt taste after the tank and mouthpiece are clean points to a coil that needs replacing. Check the device maker's instructions for coil care and replacement, and use the correct coil for your device.
How often should I clean my vape tank?
Cleaning frequency depends on how often you use the device and its design. Wipe visible spills and residue promptly, and clean the tank when changing e-liquid or when buildup affects airflow or flavor. Follow the manufacturer's instructions for your specific tank, pod, or cartridge, since some parts are not designed to be rinsed or reused. Keep battery contacts dry, and make sure all cleaned parts are completely dry before putting the device back together.
Stubborn residue and unclear device instructions can make routine care frustrating. Get started with Bay Roberts Vape and Glass Shop to find cleaning supplies and get help choosing items that fit your vape.
