
How to Properly Clean Your Vape Tank
Table of Contents
- Why Regular Vape Tank Cleaning Matters
- What You'll Need: Vape Tank Cleaning Tools
- Step-by-Step: How to Properly Clean Your Vape Tank
- The Best Way to Clean a Vape Tank
- How to Clean Vape Tank Coils: Cleaning vs. Replacement
- How Often to Clean a Vape Tank
- Common Mistakes to Avoid When Cleaning
- Troubleshooting After Cleaning
- Frequently Asked Questions
Last Updated: October 10, 2026
Why Regular Vape Tank Cleaning Matters
A dirty tank affects flavor, clouds, and device lifespan. Over time, e-liquid residue builds up inside the glass, on coils, and in narrow areas, changing how your vape tastes and performs.
Regular cleaning prevents leaks and extends tank life. Clean tanks deliver better flavor. E-liquid residue mixes with fresh juice, dulling the taste. A properly cleaned vape tank lets you taste every note of your favorite flavors.
What You'll Need: Vape Tank Cleaning Tools
Supplies should match your tank's materials. Most tanks combine glass, stainless steel, and plastic or resin, each requires slightly different care.
Essential supplies for all tanks:
- Warm water (distilled water is ideal; tap water leaves mineral deposits on glass)
- Soft cloth or microfiber cloth
- Cotton swabs or Q-tips
- Small bowl or basin
- Paper towels or kitchen towel
- Dry cloth for final drying
Material-specific considerations:
Glass tanks: Use warm water only (not hot, temperatures above 50°C can cause thermal shock and cracking). Distilled water prevents cloudy mineral buildup. If using isopropyl alcohol, limit soaks to 5 minutes and rinse thoroughly.
Plastic or resin components: Never use isopropyl alcohol or acetone. Stick to warm water and mild dish soap. Avoid boiling water. Keep water temperature below 45°C.
Metal (stainless steel) components: These tolerate warm water, mild soap, and brief isopropyl alcohol soaks. If your tank has a coated finish, avoid alcohol and abrasive cloths.
Rubber seals (O-rings): Clean with warm water and soft cloth only. Never soak in isopropyl alcohol or expose to temperatures above 50°C, which causes hardening and leaks.
Optional but helpful supplies:
- Isopropyl alcohol (70% solution, for metal and glass only, not plastic or rubber)
- Small brush with soft bristles for coil cleaning
- Spare glass tubes for your tank (useful if one cracks during cleaning)
- Pipe cleaners or thin cleaning brushes for narrow threading areas
If you want specialized vape tank cleaning tools, pipe cleaners designed for vape tanks work well for narrow areas. These thin, flexible cleaners reach spots that cloth can't, and they're safe for all tank materials.

What to avoid:
Never use bleach, vinegar, or harsh degreasers; these leave chemical residue that affects flavor and can damage seals. Boiling water is too hot for most tanks and can crack glass or warp plastic. Abrasive sponges or steel wool scratch glass and damage coatings. Ultrasonic cleaners, while popular for jewelry, can dislodge or damage O-rings and coil components in vape tanks.
Step-by-Step: How to Properly Clean Your Vape Tank
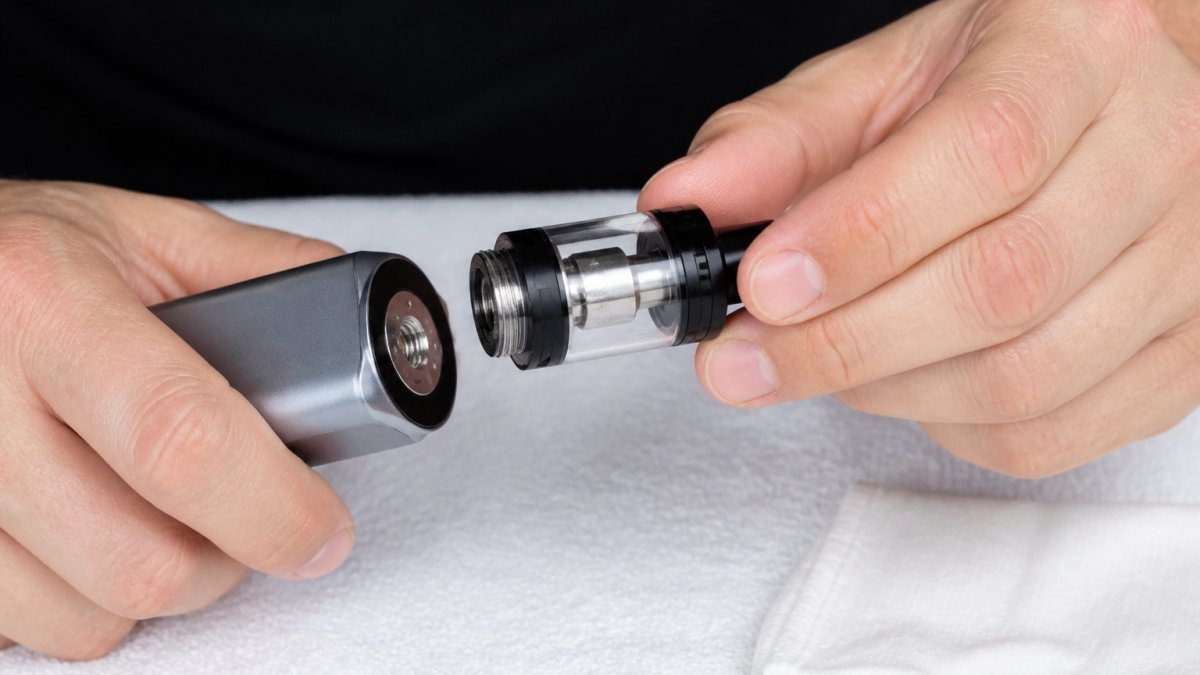
Remove the Tank from Your Vape Mod
Power off your mod if possible. Unscrew the tank counterclockwise and set the mod aside.
Disassemble Removable Tank Components
Unscrew the top cap, then the base from the glass section. If a part feels stuck, soak it in warm water for a few minutes first to loosen dried e-liquid.
Empty Leftover E-Liquid
Pour remaining e-liquid into a waste container. Wipe the inside of the glass with a paper towel to remove most liquid before rinsing.
Rinse Parts with Warm Water
Fill a bowl with warm water and soak all removable parts for 2-3 minutes. Rinse each part under running warm water, gently rubbing away loose residue. Pay special attention to the glass section and base.
Clean Stubborn Residue and Narrow Areas
Use cotton swabs to scrub stubborn residue inside the glass with small circular motions. For narrow areas, use a damp cloth. Add one drop of dish soap to rinse water to break down oils, then rinse thoroughly. For very stubborn buildup, soak for 10-15 minutes rather than scrubbing hard.
Dry Everything Thoroughly
Use a clean cloth to wipe each part, paying extra attention to the glass interior and base. Stand parts upright on a clean cloth and air dry for 5-10 minutes. Don't reassemble until completely dry.
Reassemble and Refill
Insert the coil into the base, screw the base and glass together, then attach the top cap. Fill with fresh e-liquid to the fill line. Let the coil soak for 2-3 minutes before vaping to prime the cotton.
The Best Way to Clean a Vape Tank
The best cleaning method balances speed with thoroughness.
Quick clean (5 minutes): Rinse with warm water, wipe with cloth, air dry. Use this between flavors.
Standard clean (10 minutes): Soak parts, rinse, scrub with swabs, dry completely. Do this weekly.
Deep clean (20 minutes): Soak longer, use dish soap, scrub all areas, inspect for damage. Do this monthly.
If your tank develops odors or tastes off, move to a deep clean.
The tools matter less than consistency. Even with basic supplies from home, you can keep your tank in excellent condition. Research on e-liquid composition shows that residue buildup can alter flavor compounds over time. Regular cleaning preserves the intended taste profile.
How to Clean Vape Tank Coils: Cleaning vs. Replacement
Coils present a choice: clean them or replace them. But understanding which coils can actually be cleaned, and which should never be washed, saves money, prevents damage, and improves your experience.
Important: Most modern coils are not designed for washing. Many coil types use glued or welded components, sealed cotton chambers, or mesh materials that break apart or lose performance when submerged. Always check your coil's packaging or manufacturer instructions before attempting to clean.
Coils that can be cleaned:
Older rebuildable coil designs and some mesh coils with exposed wire can tolerate gentle cleaning. If your coil has a simple wire-and-cotton construction visible from the outside, it may be cleanable.
How to clean a coil (if manufacturer permits): Soak in warm water for 10 minutes, gently wipe with a soft cloth, rinse thoroughly, and air dry for 15-20 minutes.
Never use boiling water on coils. High heat damages the glue holding coil components together and can warp metal parts.
Coils that should be replaced, not cleaned:
Most pre-made coils sold today (especially mesh coils, ceramic coils, and sealed cartridge-style coils) are engineered for single use. Cleaning them does not restore performance because:
- The cotton inside is saturated and cannot be fully dried without damaging the coil structure.
- Glued seams weaken when wet and may separate during cleaning.
- Mesh and ceramic materials can degrade or flake if submerged.
- The heating element loses efficiency after extended use, and cleaning does not restore it.
Signs you need a new coil: Burnt taste persisting after cleaning, weak vapor that doesn't improve, gurgling or spitting, visible damage, 2+ weeks of daily use, or coil won't come clean.
Coil lifespan and replacement schedule:
New coils typically last 1-4 weeks depending on use and e-liquid type:
- Light use (a few times daily): 3-4 weeks
- Moderate use (several times daily): 1-2 weeks
- Heavy use (all-day vaping): 5-7 days
- Very heavy use (constant vaping): 2-4 days
Sweeter e-liquids and high-nicotine formulations burn coils faster because they caramelize on the heating element. If you notice coil life dropping, switching to a less sweet juice can extend it.
Cleaning extends coil life only if designed for it and the problem is residue, not heat damage. A quick water rinse between flavors can extend life by 3-5 days. If the coil has been in use 2+ weeks, replacement is the only option.
At Bay Roberts Vape and Glass Shop, we stock replacement coils for popular tanks.

How Often to Clean a Vape Tank
Cleaning frequency depends on how much you vape. Here's a practical schedule:
| Vaping Habit | Cleaning Frequency | Method |
|---|---|---|
| Light (few times per day) | Every 2-3 weeks | Quick rinse |
| Moderate (several times daily) | Every 1-2 weeks | Standard clean |
| Heavy (all day vaping) | Every 3-5 days | Deep clean |
| Very heavy (constant use) | Every 1-2 days | Quick clean between flavors |
Watch for warning signs that cleaning is overdue:
- Flavor tastes muted or off
- Vapor production drops noticeably
- Tank looks cloudy or has visible residue
- You notice a burnt smell
If any of these happen, clean immediately. Don't wait for your scheduled cleaning day.
Common Mistakes to Avoid When Cleaning
New vapers often make cleaning errors that damage tanks or reduce performance. Avoid these common problems:
Using boiling water. Boiling water can crack glass and damage rubber seals. Warm water (not hot) is all you need.
Reassembling wet parts. Water inside the tank mixes with e-liquid and ruins the taste. Always dry completely.
Scrubbing too hard. Aggressive scrubbing scratches glass and damages coil cotton. Use gentle pressure.
Using harsh chemicals. Bleach, vinegar, or strong cleaners leave residue that affects flavor. Stick to warm water and mild dish soap.
Forgetting the O-rings. These rubber seals collect residue and cause leaks if dirty. Clean them every time.
Soaking too long. More than 20 minutes doesn't clean better; it just wastes time. Soak smart, not long.
Not priming new coils. Vaping on a dry coil burns the cotton. Always wait 2-3 minutes after refilling.
Troubleshooting After Cleaning
Sometimes tanks act up after cleaning. Here's how to fix common issues:
Tank leaks after cleaning. Check that O-rings are in place and clean. Leaks usually mean seals aren't seated properly. Disassemble and reseat each ring.
Weak flavor after cleaning. The coil may need priming time. Wait 5 minutes and try again. If flavor stays weak, the coil may be damaged.
Tank tastes like soap. You rinsed with soap but didn't rinse enough. Rinse again with clean water several times until the taste disappears.
Coil gurgles after cleaning. Water got inside the coil. Let it air dry for 15-20 minutes. If gurgling continues, replace the coil.
Tank doesn't screw on properly. The threads may have debris. Wipe the threads on both the tank and mod with a dry cloth.
E-liquid tastes like water. Water is trapped inside the tank. Disassemble everything and air dry for 30 minutes before refilling.
Most problems solve with simple steps. If an issue persists, bring your tank to Bay Roberts Vape and Glass Shop. Our team can help you troubleshoot.
Frequently Asked Questions
How often should you clean a vape tank?
Clean your vape tank every 1-2 weeks with regular daily use, or when you notice a drop in flavor quality. If you switch e-liquid flavors frequently, clean between each change to prevent flavor ghosting. Tanks used occasionally may only need monthly cleaning. Warning signs include muted flavor, darker residue buildup inside the glass, or a burnt taste even with a fresh coil.
Can you clean a vape tank with just water?
Yes, warm distilled water alone handles most routine cleaning effectively. For stubborn e-liquid buildup or sticky residue, add a drop of antibacterial washing-up liquid to warm water, soak the parts for 10-15 minutes, then rinse thoroughly with clean water. Avoid tap water if possible, as minerals can leave deposits. Always dry completely before reassembly.
Should you remove the coil before cleaning a vape tank?
Yes, always remove the coil before cleaning. Coils contain electrical components and cotton that can be damaged by water. Unscrew or press-fit the coil out, then clean the tank body, glass, top cap, and base separately. You can gently rinse coils in warm water if they're still usable, but avoid soaking them. Most vapers replace coils during cleaning rather than reusing them.
What's the best way to clean a vape tank without damaging it?
Use warm (not boiling) distilled water and avoid harsh scrubbing on the glass. For narrow areas like the drip tip or mouthpiece, use cotton swabs or pipe cleaners like Big Ben Pipe Cleaners ($3.00 for 50 pack) to reach inside without forcing anything. Never use abrasive cloths on glass, and let parts air-dry completely on a clean surface before reassembly. Handle the glass section carefully to prevent cracks.
Keeping your vape tank clean is straightforward once you know the process. Regular cleaning improves flavor, prevents leaks, and extends your device's life. Whether you're new to vaping or experienced, a clean tank always performs better. Visit Bay Roberts Vape and Glass Shop to pick up cleaning supplies or replacement coils for tanks like the Horizon Tech Falcon Legend. Our team is ready to help you maintain your equipment and find exactly what you need.